Have you considered making your own MC4 solar cables? Let me show you how easy it is.
Why might you consider this over buying pre-assembled solar cables? The bottom line: you’ll save you money on larger RV solar installations and get a more professional result. Unfortunately, I learned this the hard way by buying and chopping up lots of pre-wired cables.
When I first started wiring up solar panels, I used pre-assembled MC4 solar cables to make my PV connections. As my off-grid solar system kept expanding I realized I was wasting my money on numerous fixed length MC4 cables.
Since then, I’ve been customizing all of my PV cables specifically for each installation. It’s not difficult to do. I’ll show you how in just a moment.
When is a good time to use pre-assembled MC4 cables?
You may be thinking: I have a small RV and a very basic solar setup? Is it worth getting the tools and materials when I all you need is to connect a couple of solar panels just this once?
You’d be correct. In that situation it’s not worth it. Fixed-length cables probably are the best option for some basic installations when you don’t need much solar cable.
If you only have a short run to the solar charge controller with one or two solar panels, then going with a pre-assembled MC4 extension cable is the way to go. Consider this scenario.
How to wire a simple solar system with one MC4 Cable
Let’s say you have a couple of solar panels mounted to the roof of a van and a solar charge controller mounted inside.
For the purposes of the example, I’m assuming your controller is wired to the battery and you’ve got the necessary fuses and switches installed.
Mount your solar panels close together and connect them in series using the existing MC4 cables on the solar panel. Or connect them in parallel using a couple of MC4 “Y” connectors. Here’s an article/video I created explaining parallel vs series solar connections.
All that remains is to run the positive and negative outputs from your solar into your van.
There’s no need to buy two MC4 extension cables for this. You’ll end up cutting MC4 connectors off of one end and wasting your money. Instead:
- Buy one long extension cable twice as long as the distance to your solar charge controller
- Cut the cable in half and you’ll end up with two cables
- Connect the MC4 ends of the cables to the solar panel MC4 outputs
- Finally, connect the two bare wires on the other end to your solar charge controller.
That’s it. You’re small solar system is ready.
What if you have a larger system?
Why you should make your own cables for larger solar installations
More and more RV owners these days are installing larger and more complex solar systems to power larger battery banks. If this sounds like you, then I would suggest learning how to make your own cables. Here’s why.
You won’t know the exact cable lengths before installation
There are many factors that determine how much cable you’ll need. On the day of installation you may decide to move a panel over a little bit or even change the entry point for your cables.
Any pre-ordered extension cable will then be either too long or too short. If you’re lucky, the cable is too long and the extra cable gets bunched up on your roof.
When assembling cables, I cut cable to the exact length needed after the solar panels and other hardware is in place.
You Won’t Waste MC4 Connectors
Pre-assembled cables have MC4 connectors on each end. However, you’ll have to cut off one of the MC4 connectors if you plan on connecting one end to a junction box, fuse, or other device. Unfortunately, MC4 connectors are not reusable once installed. So you will have wasted money on that pre-assembled cable.
When you make your own cables, then only the cable ends needing an MC4 connector will get one.
Other MC4 connectors may not be compatible
Sure. MC4 connectors should be compatible with each other. Unfortunately, when buying extension cables and connectors from various on-line sources, some may not fit perfectly together.
A poor MC4 connection may cause a loss of power, heat build up or allow moisture to get in.
Buying all of your MC4 connectors from the same source, helps to eliminate this problem.
Get a professional result
At the end of the day, you want to do a quality job. Customizing your cables to fit your installation not only saves you money on cables, it will also give your project a more professional look.
As it turns out, MC4 cables are pretty easy to assemble yourself. Let me show you what you’ll need and how it’s done.
How to Assemble MC4 Connectors
Instead of guessing lengths and buying pre-made cables, buy bulk cable and MC4 connectors. You’ll also want to get an inexpensive cable crimper to ensure you have good quality connections.
I’ve created this page on my parts site with everything you’ll need to get in order to make MC4 cables.
Tools And Materials You’ll Need
Here are the main things you’ll need to get
- Solar Cable
- MC4 Connectors (pack of 5)
- MC4 Crimping Tool
- MC4 Connector Assembly Tool (not required but handy to have)
How to assemble MC4 connectors and make a custom solar cable
1. Measure and cut the cable to the necessary length

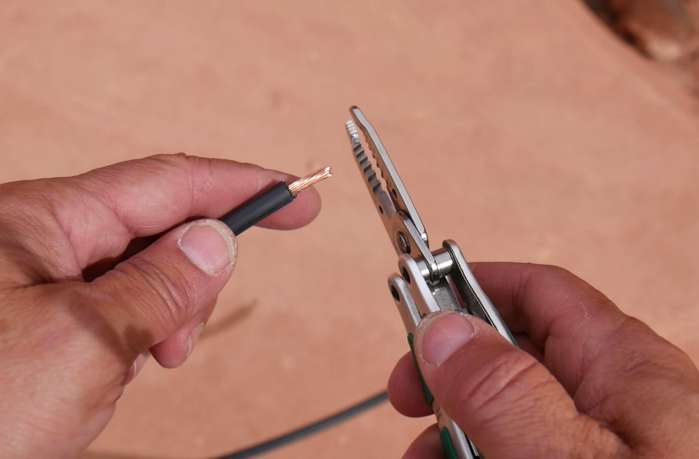
2. Strip roughly ½ inch of shielding from the ends of the cable

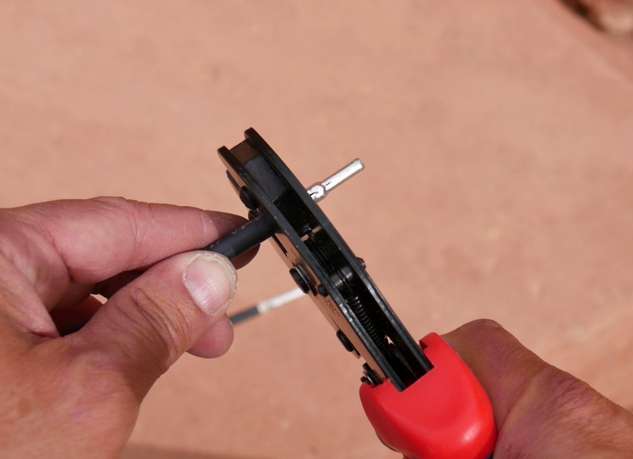
3. Place the open end of the metallic conductor of the MC4 connector in the crimper

4. Insert one end of the cable into the connector and squeeze the crimper all the way

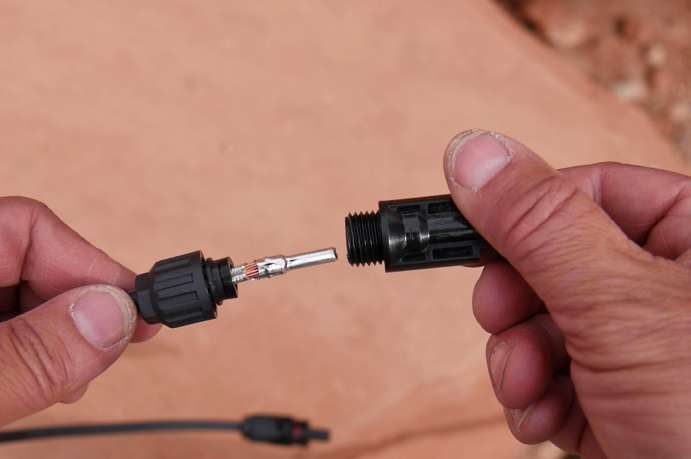
5. Disassemble the MC4 connector and slide the weather sealed end over the crimped end

6. Slide the remaining piece of the connector over the conductor until it snaps into place
7. Slide the weather sealed end up and screw it to the other end using an MC4 assembly tool if needed
8. Repeat the same process for the other end of the cable
Conclusion
Once you learn how to make your own MC4 solar cables, making future upgrades and adjustments to your solar system will be a snap. Trust me, there will be some upgrades. You can even use your new skills to help out a fellow RVer or just loan him/her a crimper.
I hope you’ll give this a project try.
